


Biga
Biga is a pre-ferment that was originally used for baking bread. This pre-ferment is obtained by mixing flour, water, and yeast.
Biga is essentially a dry dough that allows us to add certain peculiarities to the final product. Here are some properties that biga adds to the final product (e.g. pizza, bread, etc):
+ Better preservation of the end product
+ Better sensory and organoleptic properties (e.g. taste, aroma, crunchiness, and alveolation)
+ Better digestibility
When making a pizza with biga, we speak of an indirect method, which means that the mixing phase of the ingredients is divided into two parts.
The first part:
Pre ferment (biga), a mix of water, flour, and yeast.
The second part:
Final dough, which consists of the mature biga and other ingredients, such as flour, salt, malt, water and additional yeast.
For 7 dough balls of 250g
Biga:
1kg strong flour (at least 320W or 13% protein)
450 grams water
7 grams fresh yeast (or 5 grams dry yeast)
Final dough:
Mature biga
250 grams water
10 grams malt powder (Optional)
28 grams salt
*some olive oil (Optional)
Step 1
Dissolve the yeast in water. Add the water-yeast mixture to the flour and mix it all together. Make sure that all flour is well hydrated. This process should take no more than 4 or 5 minutes. It’s important to mix quickly to prevent the biga from warming up too much and developing any gluten.
After mixing: cover the biga with plastic wrap and make some small holes with a fork or toothpick. Leave the biga out for 18 hours at 18°C (64,4°F). If your room temp is greater than 18°C (64,4°F), leave it out for 2–3 hours at room temperature and then pop it in the fridge for 18-20 hours.
After 18–23 hours the biga is ready to use in the dough.
Step 2
Take the mature biga, break it into pieces and add it to a bowl. Pour 80% of the water into the bowl and leave covered for 30 minutes. The biga may have a tendency to smell a bit sour at this stage, but this is quite normal. The smell of a healthy biga is comparable to the smell of yogurt. Slightly sour, but in a good way! Also, the water will start to look almost like milk and the biga will feel softer by absorbing some of the water. After 30 minutes, it’s kneading time. So roll up your sleeves and start kneading.
After 10 minutes of kneading, add the remaining water along with malt to the dough. Knead and mix away as many lumps as possible until you obtain a homogeneous texture. The fewer lumps you have left, the better, so do your best with this one. I know, this stage isn’t the easiest, but don’t worry, a little patience and you’ll get there. In for a penny, in for a pound, right?!
Once all water is absorbed it’s time to add salt. When the salt is dissolved, the dough can be transferred to the work surface. To transfer the dough more easily, it’s best to work with slightly greased hands, so use some olive oil. Knead the dough for 5 more minutes on the work surface. Once everything is mixed you should have a dough with a fairly rough consistency. Let it sit covered for 15 minutes.
After 15 minutes, give the dough some folds and slaps. Grease your hands up for this job! Cover up again and let the dough rest for 10 more minutes. After 10 minutes, make a few more folds and slaps. The dough should now be smooth and shiny and ready for fermentation, but if you see that your dough is still “rough” repeat the 10-minute rest and fold again until the dough looks smoother. Just be careful not to overdo the folds as you can get stretch marks on the dough, a symptom of the gluten mesh breakdown that you want to avoid.
Step 3
Now it’s time for bulk fermentation. Put the dough in a greased container. Let it sit at room temperature for 1–2 hours.
After bulk fermentation: Divide the dough into 230–260g balls. If you see that the dough has a tendency to stick, resist the temptation to add more flour (to avoid changing the final hydration of the dough). Use as little flour as possible! Place the dough in a dough tray or in closed oiled containers. Leave the pizza balls to ferment at room temperature for another 2–4 hours. These times are for a room temperature of 23-25°C (73,4°F- 77°F), so keep in mind that times vary with changing weather conditions. In the winter, the dough will have to rise longer. Please watch your dough and not the clock. We don’t share the same temperatures and humidity!
Step 4
Now we have arrived at perhaps the best part of pizza making: the stretching part! When flattening the pizza, leave the edges alone. Push the air outward from the center towards the crust. If you want a more detailed explanation, check out Pieter’s stretching tutorial.
Step 5
Fire up your oven, dress your pizza with your favorite toppings and bake the pizza at 400°C (752°F). Keep an eye on the pizza and keep rotating it until the pizza is ready! At this temperature, your pizza will be ready within 2-3 minutes. If you bake the pizza at a lower temperature, it will take longer for the pizza to be baked.
For more know-how about biga-based pizza dough see tips and tricks.
Water temperature for biga
The final temperature of the biga must be between 19 and 21°C (66,2°F-69,8°F). To achieve this, the water temperature has to be calculated and controlled. I know, I know, it’s a lot of information but as I like to say: go biga or go home!
Water temperature is easy to calculate with a simple formula, so don’t freak out!
A fixed number is used from which the ambient temperature (A.T.) and flour temperature (F.T.) are subtracted.
Water temperature = 55 – (A.T. + F.T.)
For example:
ambient temperature: 23°C
flour temperature: 20°C
water temperature: 55 – (23 + 20) = 12 °C
If you also want to get the final dough to a perfect temperature of 21-25 °C then use this formula. = 60 – (A.T. + F.T.)
The ideal temperature of your pizza dough is between 21-25°C (69,8°F- 77°F). At this temperature the yeast will behave optimally, and your dough will thank you later!
Which flour?
For the biga you need strong flour. A protein content of 13% is perfect, or 320–340W. You can use strong 00 flour, type 0 flour or even type 1 flour, as long as it’s strong. This recipe gives a slightly wetter dough. With the right flour this shouldn’t be a problem. If you don’t have flour at home that can hold high hydration, or if you don’t feel comfortable working with high-hydration dough, feel free to lower the hydration in the final dough. The biga should be made as described in the recipe, but the final dough may be modified according to personal preference without losing quality. So if you want a dough with less hydration, decrease the amount of water in the final step of the dough making process.
Fermentation and container size
Size does matter! The choice of the container is important: it needs to be about 2.5 times bigger than the initial dough volume. The container must allow the biga to expand upwards, so use a large container for this.
Breath baby, breath
As soon as the biga is placed in the container, cover it with plastic wrap, but make sure that it can breathe. Poke some tiny holes in the plastic wrap with a toothpick or a fork, allowing aerobic activity (i.e. in the presence of oxygen). The goal of biga is yeast production and flavor development, but not leavening of the mass. Most of the growth happens in the refreshed dough and not in the biga. That is why it is important that there are air gaps that allow aerobic activity. In an aerobic state, the yeast cells can reproduce, but they ferment the dough to a smaller extent. This allows the yeast to reproduce but reduces excessive acidification (the optimum pH value ranges from 5.3 to 5.5 for a biga that is managed at room temperature) and degradation of the gluten mesh.
The first bite is with the eyes
It’s true, we eat with our eyes first. When making biga, most of the sugars in the flour are used during the process maturing the biga. So you will see that when you bake pizza from a biga dough, it will look pale. This is because the dough ran out of sugar. Luckily, we have a true hero who can help us with this — meet diastatic malt powder, made from grain that contains several enzymes, which break down the starch in the flour into simple sugar. When adding malt powder to the dough, these sugars will caramelize during the baking and give your pizza a beautiful brown color!
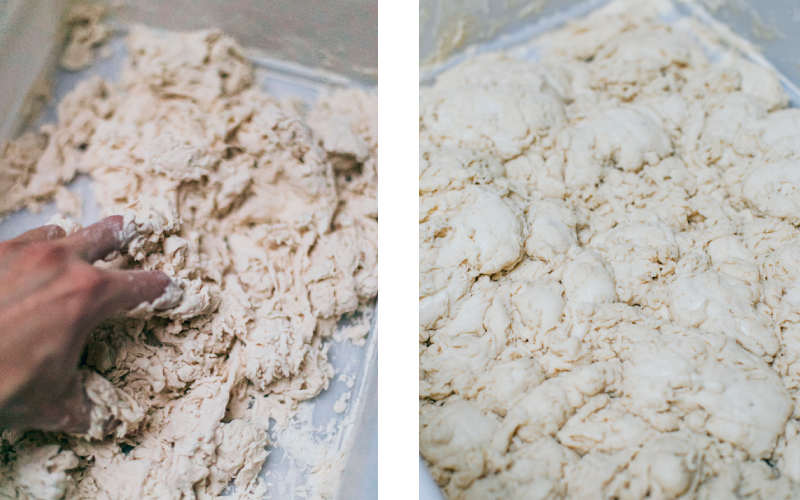
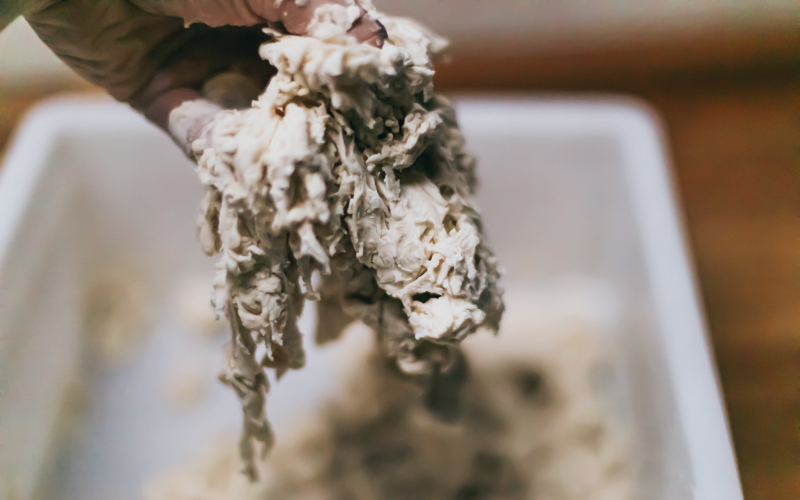
We don’t knead, we crumble
Biga is a dry dough, but different from regular dough. Why? Because regular dough has a formed gluten network, unlike biga. It’s very important to not develop gluten when making biga. If you knead the biga for too long, the dough will get too warm, and it will ferment much faster. This will make the biga develop less characteristic aromas. The physical process of making biga is more like crumbling bread. Even if it is against our routine, we don’t knead, we crumble!
Temperature
Biga is kept at a temperature of 16–18°C (60,8°F–64,4°F) for 18–20 hours. I use my wine cooler because it has adjustable temperature settings so I can precisely set the temperature level to my liking. If you don’t have this option, this step may be difficult when your room temperature is higher than 18°C (64,4°F), especially in summer months. Luckily there is a solution for everything: leave the biga after mixing 2-3 hours at room temperature, then put the biga in the fridge at 4°C (39,2°F) for 16–18 hours.
Machine Mixing?
If you don’t like to break a sweat, I recommend using a dough machine or stand mixer.
+ Break the matured biga into pieces and put it in the mixer, turn the mixer on and start mixing at the lowest speed. Now gradually add water, making sure to use slightly colder water than what the formula indicates. In a mixer, friction will generate some heat that you wouldn’t get with hand kneading.
+ After approximately 5 minutes, 65% of water is added to the mixture, now it’s time to add malt. Keep mixing and turn the speed to medium high (150 rpm).
+ Keep adding water, but don’t rush it… little by little, please!
+ After about 10 minutes, 80–90% of water is in the mix. Once the dough is starting to take on a pumpkin-like appearance, it’s time to add salt. For the final step, turn your mixer up to the highest speed (180–210 rpm). The dough is ready when it is 21–25°C (69,8°F-77°F). This whole mixing process should take 15–20 minutes!